How to design and prep a Ruby on Rails model architecture

Moving along in our web and mobile development series, here we'll discuss the process of prepping Ruby on Rails models before receiving HTML views, CSS, and initial JavaScript files (i.e. the “cutups”) from your designer to merge in to your app.
[Author's note: I wrote the first couple dozen tutorials in this series a few years ago and I'm in the process of updating the content to reflect the evolution of best practices in the industry. Please comment if you see anything I missed that should be updated. Thanks!]
First things first: list out your models
The cool thing about writing code in general, and Rails in particular, is that you don't need to get this nailed from the start. Through the processes of developing your app you will add/remove models and add/remove/modify columns (i.e. attributes you'll be storing in a database) very often.
At this stage in the game I'd recommend quickly list out the model names. You should be in Minimum Viable Product (MVP) mode here, so don't add more models than you absolutely need to as you start. Many devs like to use Unified Modeling Language (UML) modeling tools to build out their models (attributes and relationships), but I prefer to make a simple list — get it in the code ASAP — and iterate from there.
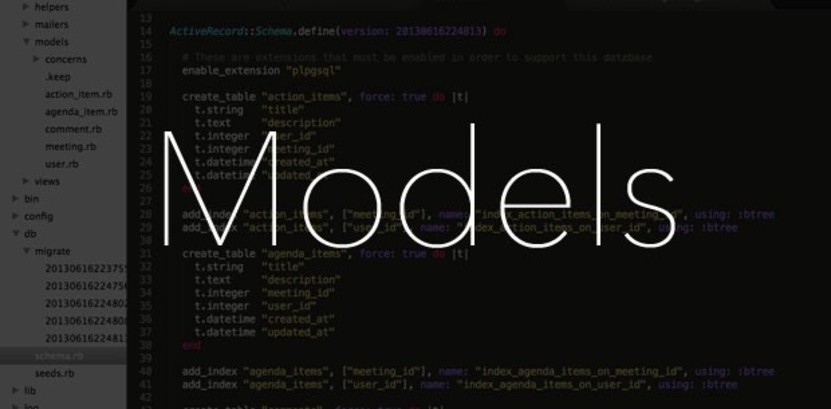
Here is the list of models we'll be using (to start) in our example app (you should be working on your own app idea in parallel with this tutorial series to get the most out of it):
User
Meeting
AgendaItem
ActionItem
Comment
At this point you should have questions whether or not to add more. In our example app, for example, do we need attachments to our Action Items and/or Agenda Items? This is where the rubber meets the road for your MVP and where Lean philosophies turn into practice.
Here is a question we can ask ourselves: Will our product still be viable without an attachments feature? In other words, will we still be able to test our core value and growth hypotheses without it? Remember, our value hypothesis is that users want a simple app that organizes our 4 main resources, and the growth hypothesis is that users will directly invite other users in to use it.
Based on this analysis, then, the answer is no: we can build out an attachment feature later if users want it. It's better to ship early and often. Build → Ship → Test → Evaluate → Repeat.
Model relationships
Rails has a nice semantic way to declare model associations (you should pause for a moment and read about them here). We'll go ahead and use the association methods in our quick list and copy/paste them into our model files later below:
User
  has_and_belongs_to_many :meetings
  has_many :action_items
  has_many :agenda_items
  has_many :comments
Meeting
  has_and_belongs_to_many :users
  has_many :agenda_items
  has_many :action_items
AgendaItem
  belongs_to :user
  belongs_to :meeting
  has_many :comments, :as => :commentable
ActionItem
  belongs_to :user
  belongs_to :meeting
  has_many :comments, :as => :commentable
Comment
  belongs_to :commentable, :polymorphic => true
  belongs_to :user
Pretty much every app has interesting relationships that can be tricky to nail to start. Every beginner ends up reversing the has_many/belongs_to placements at some point, for example, or gets the syntax wrong for a polymorphic association (i.e. that Agenda Items and Action Items can both have comments). Rails will give you a helpful error when you do this, so you can always go in and fix it (← this is the day-to-day life of a dev).
It's difficult to over-emphasize the importance of thinking carefully about these model relationships. This is where a dev earns their wage; the design of the database dramatically affects both the speed of the app and the simplicity of the code. The conventions of Rails are super helpful here, but they can only get you so far. Keep it simple.
For example, I could add a “follower” feature between Users and Action Items/Agenda Items, and if I'm not careful I could end up adding more relationships that are necessary for my MVP, or ones that would be sloppy and slow. We'll think about this later and implement the feature if our users need it.
Generate your Rails app and set your model attributes
If you've been following along in this tutorial series then you may have already generated a Rails app in the first “Hello World” post. Go ahead and move or rename that folder and let's start fresh:
~/apps $ gem install rails --no-ri --no-rdoc
~/apps $ rails new OurAgendaApp -d postgresql
At this point let's go ahead and create scaffolds (← give this a quick read if you don't know what scaffolds are) for our models that we listed above. Pick one attribute per model that you know will be part of it, the rest we'll add later (here are the supported data types; we use ‘string', ‘datetime', and ‘text' here).
~/apps $ cd OurAgendaApp
~/apps/OurAgendaApp $ rails g scaffold User first_name:string
. . . #will generate a bunch of files
~/apps/OurAgendaApp $ rails g scaffold AgendaItem title:string
. . .
~/apps/OurAgendaApp $ rails g scaffold ActionItem title:string
. . .
~/apps/OurAgendaApp $ rails g scaffold Meeting starts_on:datetime
. . .
~/apps/OurAgendaApp $ rails g scaffold Comment body:text
. . .
Ok cool, now let's go ahead and fill out the attributes and other migration-related aspects of our app in our migration files. Look in the db/migrate folder and you should see 5 files. Let's go ahead and open each one and fill in more attributes:
#db/migrate/XXXXXX_create_users.rb
class CreateUsers < ActiveRecord::Migration
  def change
    create_table :users do |t|
      t.string :first_name
      t.string :last_name
      t.string :email
      t.string :password_digest #for storing crypted passwords
      t.timestamps #default created_at and updated_at attributes
    end

    #adding a join table for our
    #has_and_belongs_to_many relationship
    #model order needs to be alphabetical
    create_table :meetings_users do |t|
      t.integer :meeting_id
      t.integer :user_id
    end
    #add an index to speed queries up
    add_index(:meetings_users, [:meeting_id, :user_id])
  end
end
Migrations are awesome because Rails handles the SQL to different databases (e.g. MySQL vs. PostgreSQL) appropriately. Let's go ahead and repeat this process for our 4 other models:
#db/migrate/XXXXXX_create_agenda_items.rb
class CreateAgendaItems < ActiveRecord::Migration
  def change
    create_table :agenda_items do |t|
      t.string :title
      t.text :description
      t.integer :meeting_id #this links it to a meeting
      t.integer :user_id #the user who made it
      t.timestamps
    end
    add_index :agenda_items, :meeting_id #don't forget these
    add_index :agenda_items, :user_id
  end
end

#db/migrate/XXXXXX_create_action_items.rb
class CreateActionItems < ActiveRecord::Migration
  def change
    create_table :action_items do |t|
      t.string :title
      t.text :description
      t.integer :user_id
      t.integer :meeting_id
      t.timestamps
    end
    add_index :action_items, :meeting_id
    add_index :action_items, :user_id
  end
end

#db/migrate/XXXXXX_create_meetings.rb
class CreateMeetings < ActiveRecord::Migration
  def change
    create_table :meetings do |t|
      t.datetime :starts_on
      t.datetime :ends_on
      t.string :name
      t.string :location
      t.timestamps
    end
  end
end

#db/migrate/XXXXXX_create_comments.rb
class CreateComments < ActiveRecord::Migration
  def change
    create_table :comments do |t|
      t.text :body
      t.references :commentable, :polymorphic => true
      t.integer :user_id
      t.timestamps
    end
  end
end
Ok — great — you'll want to spend a fair amount of time with your own app to fill out as many attributes for your models as you can think of (you can easily add more later, so don't worry if you miss something). You'll want to make sure you have setup PostgreSQL on your local machine (← steps 9–11, click here if you are a Windows user), then setup a super user for your database if you haven't yet:
~/apps/OurAgendaApp $ createuser --login --createdb OurAgendaApp
#say yes to being a super user if prompted
Now you are ready to run your migrations:
~/apps/OurAgendaApp $ rake db:create
~/apps/OurAgendaApp $ rake db:migrate
Finally, insert your model associations and test them
From our list above, open up your five model files (in app/models) and paste in the associations we wrote down:
class User < ActiveRecord::Base
  has_and_belongs_to_many :meetings
  has_many :action_items
  has_many :agenda_items
  has_many :comments
end

class Meeting < ActiveRecord::Base
  has_and_belongs_to_many :users
  has_many :agenda_items
  has_many :action_items
end

class AgendaItem < ActiveRecord::Base
  belongs_to :user
  belongs_to :meeting
  has_many :comments, :as => :commentable
end

class ActionItem < ActiveRecord::Base
  belongs_to :user
  belongs_to :meeting
  has_many :comments, :as => :commentable
end

class Comment < ActiveRecord::Base
  belongs_to :commentable, :polymorphic => true
  belongs_to :user
end
Awesome. Now, in order to secure passwords for our users, making use of that password_digest attribute we added to our user model, we have to add a couple things to our user.rb file to make use of Rails' has_secure_passwordmethod:
class User < ActiveRecord::Base
  has_and_belongs_to_many :meetings
  has_many :action_items
  has_many :agenda_items
  has_many :comments

has_secure_password
  before_validation :secure_password_digest
And we need to add this line to our Gemfile (located in the root dir of your Rails app). You will see this line at approx line 36 and can uncomment it:
gem 'bcrypt-ruby', '~> 3.0.0'
Now that your models are setup, let's go ahead and fire up a console and test them out. This will teach you a lot about how Ruby on Rails works.
~/apps/OurAgendaApp $ bundle install
~/apps/OurAgendaApp $ rails c
> User.create! first_name: "Jack", email: "jack@test.com", password: "1234", password_confirmation: "1234"
> user = User.first
> user.meetings.create! name: "test meeting"
> meeting = Meeting.first
> meeting.agenda_items.create! title: "test agenda item", user_id: user.id
> meeting.action_items.create! title: "test action item", user_id: user.id
> ActionItem.first.comments.create! body: "Hello World"
…you get the idea. Keep playing around in the console, creating and calling objects, etc… to get a feel for how models and associations work in practice.
Once you are done, “exit” out and go create a new repository in your Github.com account (set one up if you don't have one yet) and call it OurAgendaApp (you do not need to initialize it with a README). Then, assuming you have Git installed and your public SSH key added to Github:
~/apps/OurAgendaApp $ git init
~/apps/OurAgendaApp $ git add .
~/apps/OurAgendaApp $ git commit -m "Initial Commit"
~/apps/OurAgendaApp $ git remote add origin git@github.com:YOUR_GITHUB_USERNAME/OurAgendaApp.git
~/apps/OurAgendaApp $ git push origin master
And there you go, you are on your way. Hopefully you have been repeating these steps with your own app idea? A great place to ask questions if you get stuck is Stack Overflow, or feel free to contact me below.
- — -
In the next post in this series we will learn how to setup this Rails app for test-driven and behavior-driven development. Previous post: How to work with a designer to efficiently build mockups for your app.
Startup Rocket
We help entrepreneurs ideate, validate, create, grow, and fund new ventures.
Based on decades of startup experience, our team has developed a comprehensive operations framework, a collaborative online tool, and a personalized coaching experience to help take your business to the next level.